
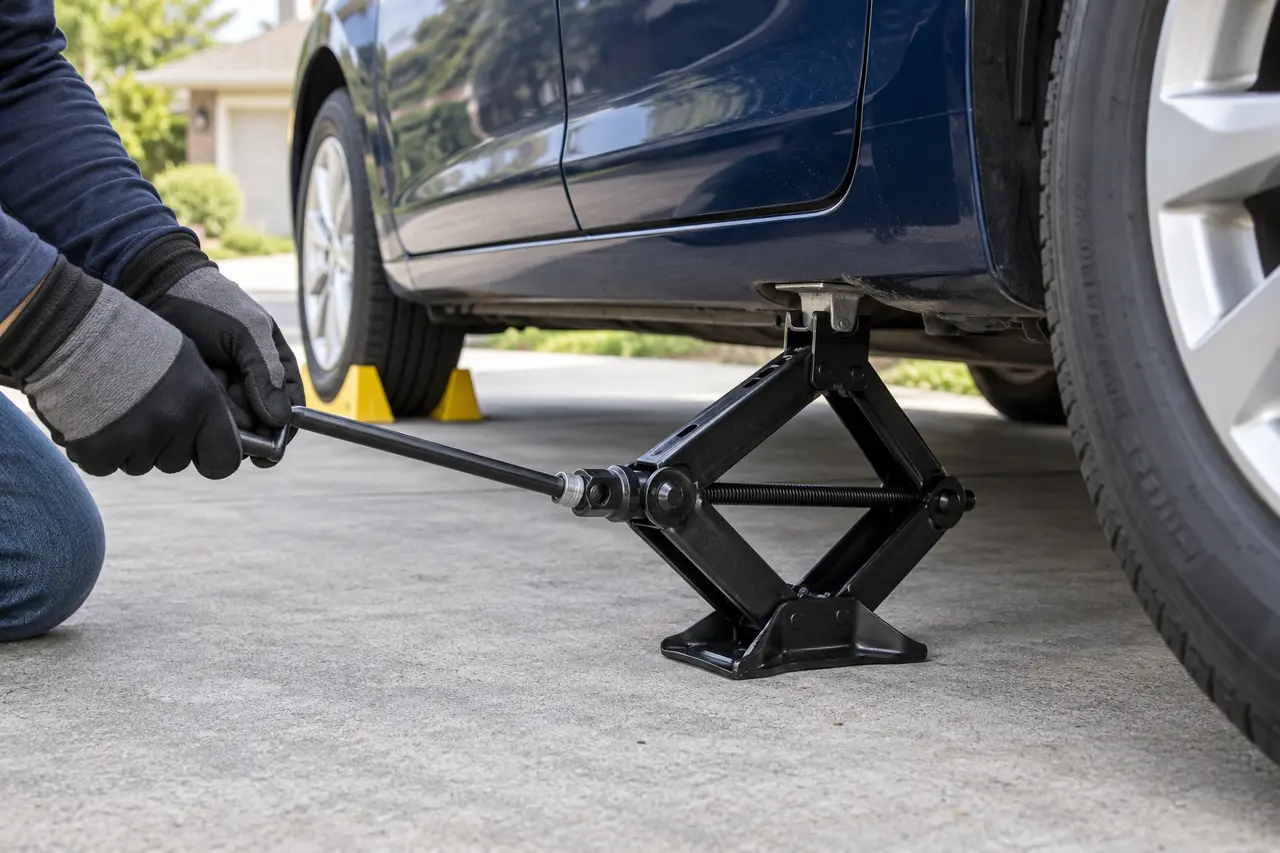
To use a scissor jack, park on firm, level ground, secure and chock the vehicle, find the manufacturer-approved lift point, place the jack base flat, align the saddle, and turn the handle slowly. Raise the vehicle only enough to fit the spare and never go beneath it.
A scissor jack is designed for a limited task and load. The vehicle manual and jack label determine where and how it can be used. Stop when the site, jack, lift point, or vehicle condition is uncertain.
1. Is the Location Safe for Lifting?
Use firm, level pavement away from moving traffic. A parking lot, driveway, or wide turnout is safer than a narrow shoulder. Hazard lights and warning devices improve visibility but do not provide physical separation from traffic.
Do not lift on a slope, soft shoulder, mud, sand, deep gravel, ice, broken pavement, or an area with flowing water. The jack base can slide, sink, or tilt. Request roadside assistance when a stable surface is unavailable.
2. What Instructions and Capacity Apply?
Read the vehicle owner’s manual and the jack label before use. Confirm that the jack belongs to the vehicle or has adequate rated capacity, correct lift range, and a saddle compatible with the specified point. Vehicle weight alone does not confirm fit.
Electric vehicles, sport utility vehicles, trucks, air-suspension vehicles, and modified cars can have special lifting requirements. Some require a jack mode or prohibit contact near battery areas. Follow those instructions exactly.
3. How Do You Secure the Vehicle?
Switch on the hazard lights. Place an automatic transmission in Park. For a manual transmission, select the gear stated in the manual. Apply the parking brake fully and turn off the engine unless model-specific instructions require another state.
Place purpose-made wheel chocks as directed, commonly at the wheel diagonally opposite the flat. Chock both sides when the chock design and instructions permit. Remove passengers and pets from the vehicle and keep them away from traffic and the lifting area.
4. What Must Be Done Before the Wheel Leaves the Ground?
Remove the spare, jack, wrench, wheel-lock key, and other needed tools before lifting. Check that the spare is usable and inflated. Opening a hatch or pulling cargo after lifting can rock the vehicle.
Remove the wheel cover when necessary. Loosen each lug nut or wheel bolt slightly while the tire remains on the ground. Use the correct wrench and controlled force. Do not remove the fasteners at this stage.
5. How Do You Find the Correct Jack Point?
Use the diagram in the owner’s manual. Many passenger cars have reinforced pinch-weld sections near each wheel, often marked by notches or shaped metal. Other vehicles use frame, subframe, or axle locations. The visible rocker panel is not automatically a lift point.
Use a headlamp to inspect the area from beside the vehicle. Do not place your head beneath the body. Clear loose debris without reaching into a position where the vehicle could trap a hand.
6. How Should the Scissor Jack Be Positioned?
Set the jack base flat on the pavement directly below the approved point. Orient the saddle as shown by the manufacturer. A slotted saddle may need to straddle a pinch weld, while another design may contact a reinforced pad.
Turn the screw by hand or with the handle until the saddle approaches the vehicle. Recheck alignment from a safe side view. The jack should not lean to reach the point. Move the base while it is unloaded if alignment is wrong.
7. How Do You Make Initial Contact?
Raise the saddle slowly until it touches the lift point. Pause before the tire begins to unload. Confirm that the saddle is centered, the base is fully supported, and no trim, seam, line, battery cover, or unsupported panel is trapped.
Watch both the jack and vehicle. A correctly aligned setup should take load through the designed contact surfaces. Lower and reposition if the saddle moves, the base lifts at one edge, or sheet metal begins to deform.
8. How High Should You Raise the Vehicle?
Turn the handle smoothly and keep your body beside the car. Raise only until the flat tire clears the ground and the inflated spare will fit. The spare can be taller than the flat, so allow only the needed additional clearance.
Do not extend the jack beyond its marked or designed range. Do not add blocks on top of or under the jack to gain height. If the jack cannot provide correct clearance while remaining stable, lower the vehicle and request suitable equipment.
9. What Should You Monitor While the Vehicle Is Raised?
Keep checking the base, screw, arms, saddle, lift point, chocks, and vehicle position. Stop immediately if the jack leans, sinks, shifts, twists, or makes unusual contact. Keep everyone away from the vehicle.
Never crawl underneath or place a body part in the fall zone. Remove and install the wheel from beside the hub. Do not sit in, lean on, or start the vehicle while it is raised.
10. How Do You Lower the Scissor Jack?
Install the spare and tighten fasteners by hand in the specified crossing sequence while the wheel is raised. Turn the jack handle in the lowering direction slowly. Keep feet, tools, and the flat wheel clear of the descending vehicle.
Once the tire supports the vehicle, complete tightening according to the manual. Remove the jack and chocks only when the vehicle is fully stable. Use a suitable torque wrench for final specified torque when available.
What Are the Most Common Scissor-Jack Mistakes?
- Wrong lift point: thin floor or rocker metal can deform and let the jack move.
- Uneven ground: a small base becomes unstable when the surface slopes or compresses.
- No wheel chocks: the vehicle can roll even with the parking brake applied.
- Fasteners fully tight: heavy loosening force can rock the raised vehicle.
- Excess lift height: additional height reduces stability without helping the wheel change.
- Body beneath vehicle: an emergency jack cannot provide safe under-vehicle support.
- Improvised extension: blocks or adapters can shift and change the load path.
When Should You Stop and Call for Help?
Stop when the location is exposed to traffic, the ground is unstable, the jack is damaged or wrong for the vehicle, the lift point cannot be confirmed, or the vehicle has collision or suspension damage. Also stop if physical strain or uncertainty prevents controlled operation.
Compare the tool with a floor jack versus scissor jack guide, learn how to find the car’s jack points, and keep the correct equipment in an emergency tire kit. Safe lifting begins with the correct location and approved contact point.
Quick answers
Frequently Asked Questions
Is a scissor jack safe for changing a tire?
Yes, when it is approved for the vehicle, correctly positioned on firm level ground, and used only for the intended wheel change. Never place any part of your body beneath a vehicle supported only by a scissor jack.
Where do you place a scissor jack?
Place it at the reinforced lift point identified in the vehicle owner’s manual. Many passenger cars use a marked pinch-weld area near the affected wheel, but lift-point designs vary. Do not guess from appearance alone.
How high should a scissor jack lift the car?
Raise the vehicle only enough for the inflated spare to clear the ground and fit onto the hub. Excess height reduces stability and is not needed for a wheel change.
Can you use wood under a scissor jack?
Do not use improvised blocks or extensions unless the vehicle or jack manufacturer specifically approves the exact support method. Loose wood can split, shift, or create an unstable load path. Move to a firm surface instead.
Can you work under a car held by a scissor jack?
No. An emergency scissor jack is not under-vehicle support. Keep hands, feet, head, clothing, and tools out of the space beneath the vehicle. Use properly rated stands and an appropriate work area for service that requires under-vehicle access.