
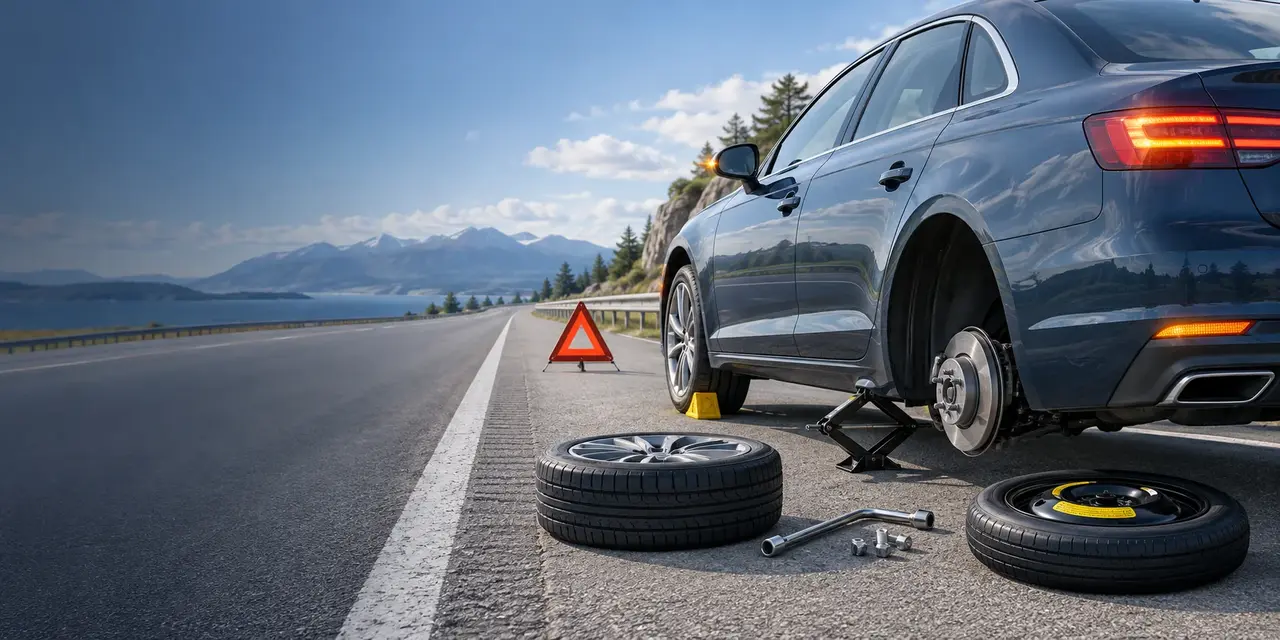
To change a tire, park on firm, level ground, secure the vehicle, loosen the lug nuts, lift from the approved jack point, remove the flat wheel, install the spare, and tighten the lug nuts to the manufacturer’s specification.
A roadside tire change replaces the complete wheel and tire assembly with a spare. It does not remove the rubber tire from the rim. Removing a tire from a rim requires tire-changing equipment and is normally completed by a tire technician.
The correct process depends on the vehicle. Jack points, lifting instructions, wheel-fastener types, torque values, and spare-tire limits differ between models. Read the owner’s manual before lifting the vehicle. Use the instructions and equipment supplied by the vehicle manufacturer whenever they differ from this general guide.
Key Takeaways
- Move away from traffic and stop on firm, level ground before opening the trunk or handling tools.
- Apply the parking brake, select Park or an appropriate gear, and chock the wheel diagonally opposite the flat tire.
- Loosen the lug nuts slightly while the flat tire still touches the ground.
- Place the jack only at the approved jack point shown in the owner’s manual.
- Tighten the lug nuts in a star or crisscross pattern, then use the specified torque as soon as possible.
- Stop and request roadside assistance when the location, weather, vehicle, tools, or wheel condition makes the task unsafe.
Is It Safe to Change the Tire Here?
A tire can be changed only when the vehicle is away from moving traffic and resting on a firm, level surface. A wide parking area or quiet parking lot is safer than a narrow shoulder. Hazard lights improve visibility, but they do not make an exposed roadside location safe.
Reduce speed gradually when a tire loses pressure. Hold the steering wheel firmly and avoid sudden braking or steering. Continue only far enough to reach the nearest safer stopping place. Driving farther on a flat tire can damage the tire, wheel, and related vehicle parts.
Call roadside assistance when the vehicle is on a curve, bridge, narrow shoulder, steep slope, loose soil, deep gravel, ice, or another unstable surface. Professional help is also appropriate when traffic passes close to the vehicle, visibility is poor, the wheel is damaged, the spare is unusable, or the required tools are missing.
Never work under a vehicle supported only by an emergency jack. Keep hands, feet, clothing, and other body parts away from the space beneath the vehicle. Remove passengers and pets from the vehicle, then place them in a safe location away from traffic.
The following decision table identifies common roadside conditions and the safer response.
| Roadside condition | Recommended response |
|---|---|
| Firm, level ground away from traffic | Follow the vehicle manual and tire-changing steps |
| Narrow highway shoulder or blind curve | Remain in a protected location and request roadside assistance |
| Soft soil, unstable gravel, snow, or ice | Do not raise the vehicle until it is moved to a stable surface |
| Missing jack, wrench, wheel-lock key, or usable spare | Request roadside assistance or towing |
| Smoke, fuel leak, collision damage, or unstable suspension | Move away from the vehicle and contact emergency or recovery services |
| Physical pain, limited mobility, or uncertainty | Do not attempt the lift; request trained assistance |
What Tools Are Needed to Change a Tire?
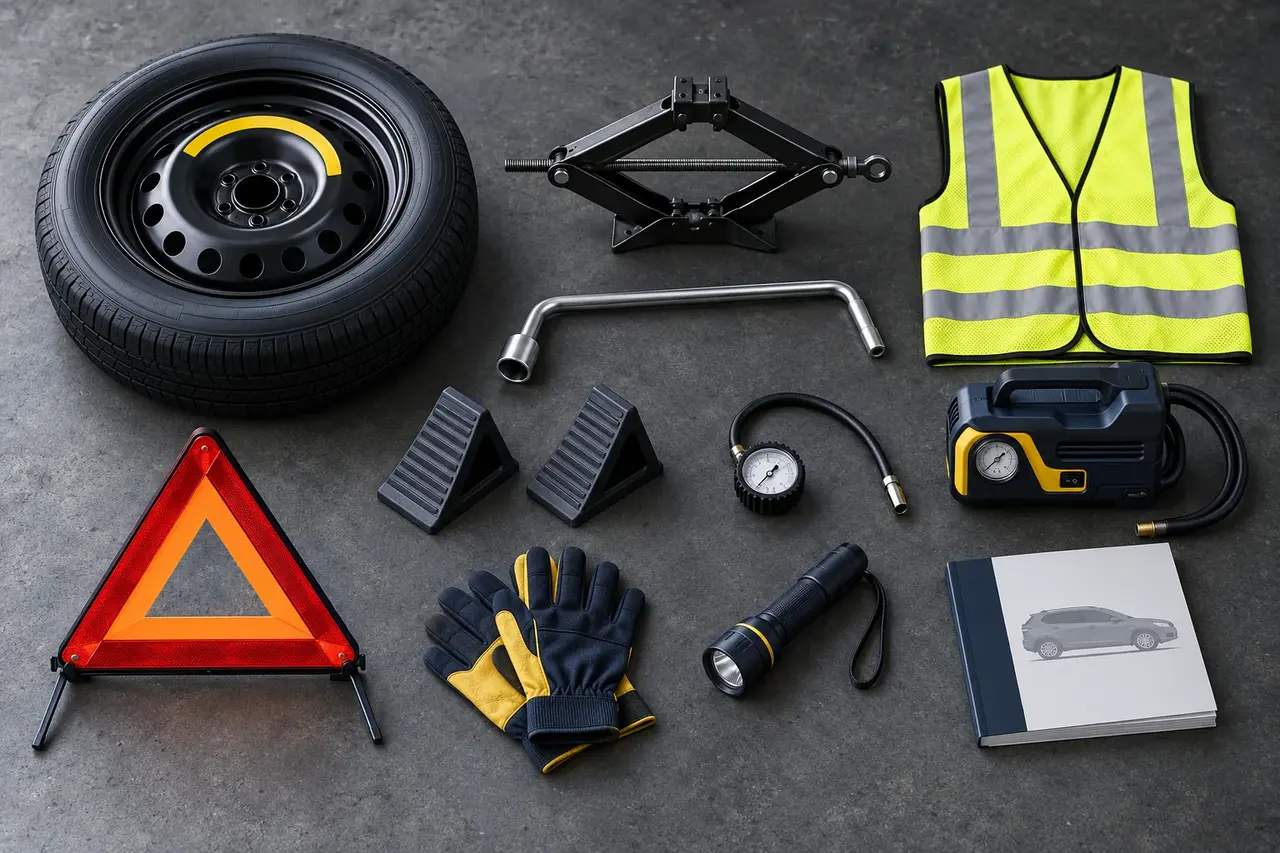
The essential tire-changing tools are an inflated spare tire, the correct jack, a lug wrench, the owner’s manual, and a wheel-lock key when locking lug nuts are installed. Wheel chocks and a tire-pressure gauge add important safety and verification steps.
Most vehicles that include a spare store the jack and lug wrench near the spare tire. Common locations include beneath the trunk floor, behind an interior side panel, under the vehicle, or beneath a rear seat. Some newer vehicles use run-flat tires or a sealant and inflator kit instead of a spare.
| Tool or item | Purpose |
|---|---|
| Spare tire or spare wheel | Replaces the damaged wheel and tire assembly |
| Vehicle jack | Raises the vehicle at an approved lifting point |
| Lug wrench or tire iron | Loosens and tightens lug nuts or wheel bolts |
| Owner’s manual | Identifies jack points, procedures, torque values, and spare limits |
| Wheel chocks | Reduce the risk of vehicle movement |
| Wheel-lock key | Releases a matching locking lug nut or bolt |
| Tire-pressure gauge | Checks whether the spare has usable pressure |
| Portable inflator | Adds air when permitted and when the spare can hold pressure |
| Reflective vest and warning triangle | Improve personal and vehicle visibility where their use is safe and legal |
| Gloves and flashlight | Protect the hands and improve visibility |
A torque wrench is strongly preferred for final tightening because a lug wrench cannot measure clamping force. Correct torque helps secure the wheel without overstretching studs, damaging threads, or making later removal unnecessarily difficult. Use the torque value listed in the owner’s manual, service information, or other manufacturer documentation.
How Do You Change a Tire?
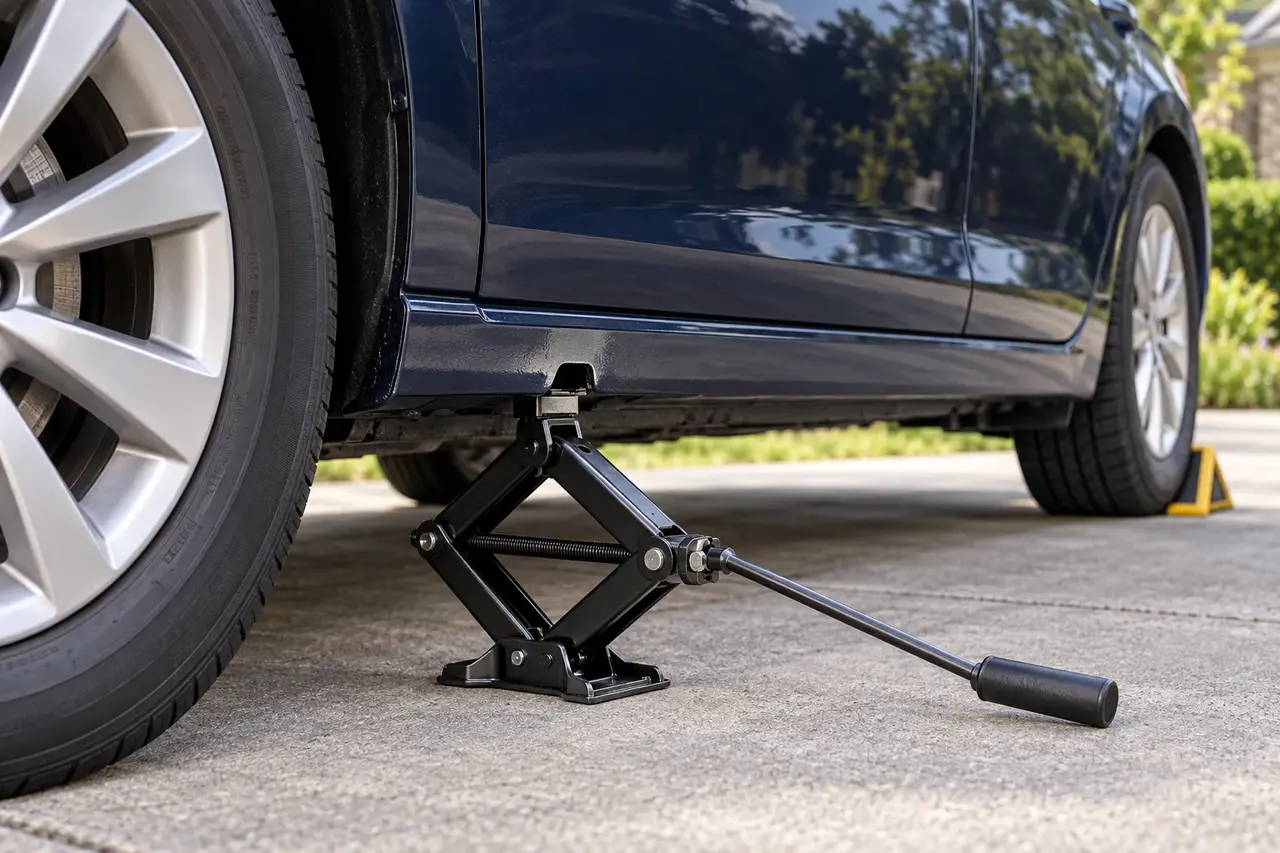
Changing a tire requires 12 ordered steps, from selecting a safe location to checking the installed spare. Complete each step before moving to the next one. Do not lift the vehicle until it is secured and the wheel fasteners have been loosened slightly.
Prepare and secure
Choose the location, secure the vehicle, and inspect the spare.
Move the Vehicle to a Safe Location
Slow the vehicle without sudden movements. Turn on the hazard lights and move as far from traffic as practical. Select firm and level pavement. Avoid stopping beside a bend, at the crest of a hill, or where another driver may not see the vehicle in time.
Do not focus only on protecting the damaged tire. A safer stopping position is more important than preventing additional tire damage. Contact emergency services when the stopped vehicle creates an immediate traffic hazard.
Secure the Vehicle Before Using the Jack
Switch off the engine after reaching a safe position. Apply the parking brake. Place an automatic transmission in Park. Place a manual transmission in the gear directed by the owner’s manual. Some electric vehicles have additional transport, suspension, or jack modes, so follow the model-specific procedure.
Place wheel chocks against the tire diagonally opposite the flat tire. Chock the front and rear of that tire when two chocks are available. Purpose-made wheel chocks are more reliable than loose rocks, bricks, or wood that can move or break.
Locate the Spare Tire and Inspect It
Remove the spare tire and tools from their storage locations. Check the spare for visible cracking, sidewall damage, exposed cords, severe corrosion, or low pressure. Read the pressure and operating limits printed on the tire and shown in the owner’s manual.
A compact spare often requires more air pressure than a regular road tire. Do not estimate the required pressure from the vehicle’s four normal tires. Use the value assigned to the spare. Do not install a spare that is visibly damaged, unable to hold air, or prohibited for the vehicle position.
Open and lift
Access the fasteners, loosen them, find the jack point, and raise the vehicle.
Remove the Hubcap or Wheel Cover
Remove the hubcap or wheel cover when it blocks access to the wheel fasteners. The lug wrench, jack handle, or a separate tool may include a flat end for this purpose. Follow the owner’s manual because some wheel covers are held by plastic fasteners or lug nuts.
Place the cover face-up and away from traffic. This protects the visible surface and creates a clean location for the removed fasteners. Do not force a decorative cover that has hidden clips or locking parts.
Loosen the Lug Nuts Before Raising the Vehicle
Fit the correct socket or lug wrench fully over each lug nut. Turn counterclockwise on conventional right-hand threads. Some vehicles or specialized equipment can use a different thread direction, so check the manual when a fastener has markings or does not respond normally.
Break each fastener loose by about one-quarter turn. Do not remove the lug nuts while the tire supports the vehicle. The ground prevents the wheel from turning and keeps the wheel attached during lifting.
Use controlled pressure on the wrench. Keep the wrench square to the nut to reduce slipping and rounding. Do not jump on the wrench, strike it with an object, or extend it with an unapproved pipe. Those methods can cause a fall, damage the fastener, or overload the supplied wrench.
Find the Correct Jack Point
The correct jack point is the reinforced lifting location identified by the vehicle manufacturer. Common passenger-car jack points are reinforced sections of the pinch weld behind the front wheel or ahead of the rear wheel. Trucks, sport utility vehicles, and electric vehicles may use frame, axle, or model-specific lifting points.
Match the jack head with the approved point. A slotted scissor-jack saddle may fit around a pinch weld. A floor jack may require a suitable pad or adapter. Do not place a jack beneath a plastic panel, exhaust component, fuel tank, high-voltage battery enclosure, suspension part, or unapproved sheet metal.
Incorrect jack placement can damage the vehicle or allow it to fall. Use roadside assistance when the approved point is damaged, covered, inaccessible, or uncertain.
Raise the Vehicle
Place the jack upright on firm ground and align it with the approved jack point. Raise the jack slowly until it makes contact. Check the saddle position before the tire leaves the ground. The jack should remain vertical and stable as the vehicle rises.
Lift the vehicle until the flat tire clears the ground and the inflated spare has enough space to fit. An inflated spare may have a larger diameter than a completely flat tire. Raise the vehicle only as high as necessary.
Stop immediately when the jack tilts, sinks, bends, shifts, or makes abnormal contact with the vehicle. Lower the vehicle in a controlled manner when possible. Do not reposition a loaded jack by pushing the vehicle.
Replace and seat
Remove the flat wheel, fit the spare, and seat it evenly by hand.
Remove the Lug Nuts and Flat Wheel
Remove the loosened lug nuts by hand or with the wrench. Store the fasteners in the wheel cover or another clean location. Dirt or damage on the threads can affect installation and tightening.
Hold the wheel with both hands and pull it straight from the hub. A wheel can be heavy, so keep the back straight and use the legs for support. Do not place a foot, hand, or head beneath the vehicle.
Some vehicles use wheel bolts instead of lug nuts on fixed wheel studs. Support the wheel while removing the final bolt and keep each bolt clean.
Install the Spare Wheel
Inspect the hub surface and spare wheel for visible damage or large debris. Do not apply oil, grease, or anti-seize compound to wheel fasteners unless the vehicle manufacturer specifically requires it. Lubrication changes the relationship between applied torque and clamping force.
Align the holes in the spare wheel with the wheel studs, then push the wheel fully against the hub. The valve stem normally faces outward. For vehicles with wheel bolts, hold the wheel in position while starting the first bolt by hand.
Start every nut or bolt by hand. Each fastener should turn several rotations without force. Stop when a fastener binds, enters at an angle, or appears cross-threaded. A cross-threaded fastener may not secure the wheel correctly.
Hand-Tighten the Lug Nuts in the Correct Pattern
Tighten each fastener by hand until it is snug. Use a star or crisscross sequence rather than moving around the wheel in a circle. The crossing pattern helps seat the wheel evenly against the hub.
For a four-lug wheel, tighten one fastener and then the fastener opposite it. For a five-lug wheel, move across the center to form a star. Six- and eight-lug wheels also use an alternating pattern across the wheel. Follow the manufacturer’s sequence when it is shown in the manual.
Do not apply full force while the vehicle remains completely raised. The wheel may rotate, and strong side force can reduce jack stability.
Lower and verify
Lower the vehicle, apply the correct torque, and complete the final checks.
Lower the Vehicle and Apply Final Torque
Lower the vehicle until the spare touches the ground and cannot rotate. Tighten the fasteners in the same crossing pattern. Lower the vehicle completely and remove the jack.
Apply the manufacturer’s specified torque with a torque wrench. Torque requirements differ by vehicle, wheel design, fastener size, and thread condition. A universal torque value is not safe for every vehicle.
Do not assume that maximum arm strength equals correct torque. Excessive torque can stretch studs, damage threads, distort brake parts, or make emergency removal difficult. Low torque can allow the wheel to loosen.
Check the Spare and Store the Equipment
Check the spare-tire pressure before driving when a gauge is available. Reinstall the valve cap. Store the flat wheel, jack, wrench, hubcap, wheel chocks, and other equipment so they cannot move inside the vehicle.
Confirm that no tools remain beneath or beside the vehicle. Check the ground for lug nuts, wheel-lock parts, and personal items. Verify that the parking brake releases normally before moving.
Drive cautiously and listen for vibration, knocking, or rubbing. Stop in a safe location and request assistance when the vehicle pulls strongly, the spare appears unstable, or an unusual sound begins.
How Should Lug Nuts Be Tightened?
Lug nuts should be started by hand, tightened in a crossing pattern, and finished at the manufacturer’s specified torque. This process centers the wheel and creates more even clamping force across the mounting surface.
Thread condition affects tightening. Rust, dirt, damage, paint, oil, and anti-seize products can change the result. Follow the manufacturer’s procedure for checking torque after installation. Stop driving when a lug nut is missing, a stud is broken, or a fastener will not tighten correctly.
What Should You Do After Installing a Spare Tire?
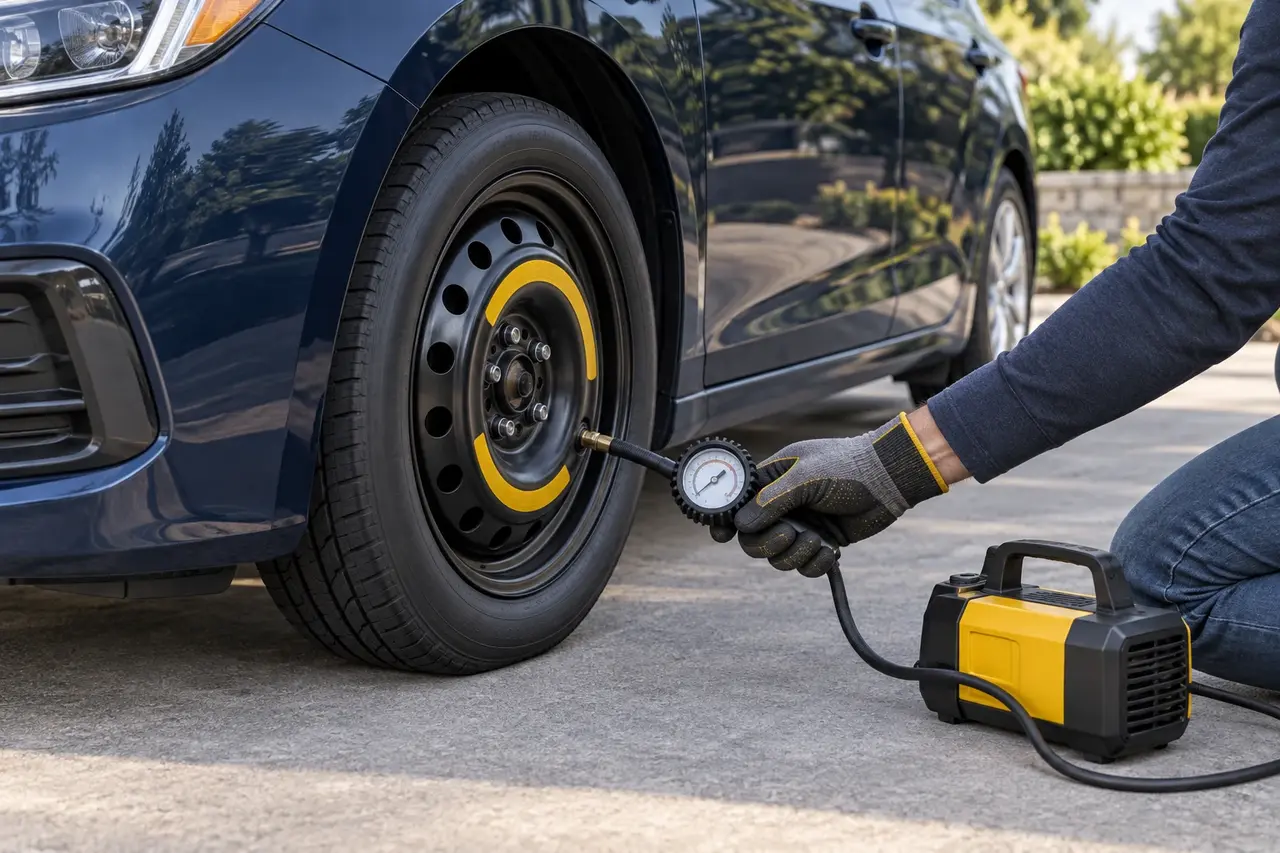
After installing a spare tire, follow its marked speed, distance, pressure, and position limits and arrange prompt tire service. A temporary spare restores limited mobility. It is not automatically equivalent to the regular wheel and tire.
Many compact spares display a maximum speed near 50 mph (80 km/h), and some are intended for only about 50 miles (80 km) of travel. These figures are common, not universal. The tire sidewall and owner’s manual provide the applicable limits for the specific vehicle and spare.
A compact spare can change braking, steering, ground clearance, traction, and the operation of the anti-lock braking system or stability control. Differences in tire diameter can also affect an all-wheel-drive system. Some manufacturers restrict which axle can receive a compact spare. Follow the model-specific placement instructions.
Take the damaged tire to a qualified tire technician. A puncture may be repairable when it is limited to an approved area of the tread and meets professional repair standards. Sidewall damage, large punctures, exposed cords, impact damage, and damage caused by driving while flat can require replacement.
What If a Lug Nut Will Not Loosen?
Stop when the wrench slips, the nut rounds, or controlled force does not release the lug nut. A damaged fastener, incorrect socket, locking lug nut, corrosion, or excessive previous torque may require professional tools.
Confirm that the wrench is fully seated and turning in the correct direction. Check for a decorative cap or wheel lock. Use the matching wheel-lock key when one lug nut has a different pattern. Keep the wrench square to the fastener and apply steady pressure without jumping or striking the tool.
A breaker bar and correct socket can provide controlled turning force, but only when the equipment is rated for the task and the vehicle remains on the ground. Do not use an improvised extension that can slip or break. Roadside assistance is the safer choice when the fastener remains seized.
What If the Wheel Is Stuck on the Hub?
A wheel can remain attached after the fasteners are removed because corrosion has bonded the wheel to the hub. Do not crawl beneath the vehicle or use force that could dislodge it from the jack.
Recheck that every fastener has been removed. Keep the body outside the vehicle’s fall zone. A stuck wheel may require controlled methods and additional support used by a technician. Reinstall the fasteners and request assistance when moderate hand pressure does not release the wheel.
Can You Change a Tire Without a Jack?
No safe general method allows a passenger-vehicle wheel to be removed without approved lifting equipment. Do not use loose rocks, stacked wood, makeshift ramps, construction equipment, or another vehicle to raise the car.
Use a compatible manufacturer-approved jack or request roadside assistance. Some cars without a spare include a sealant and inflator kit for limited tread punctures. Follow the kit instructions and restrictions. Sealant cannot safely address every puncture, sidewall cut, blowout, bent wheel, or separated tire.
How Do Weather and Location Change the Process?
Weather and road position determine whether a tire change should be attempted at all. The mechanical steps remain similar, but wind, water, darkness, ice, heat, and traffic can make a stable lift impossible.
On a highway, move beyond the travel lane and use the widest safe area available. Do not stand between the vehicle and passing traffic. Request professional assistance when the flat tire is on the traffic-facing side or the shoulder does not provide enough working room.
In rain, avoid standing water and soil that can soften beneath the jack. In darkness, use a flashlight without directing its beam at drivers. Reflective clothing can improve visibility.
Never raise a vehicle on a slope unless the manufacturer provides a safe, specific method for that situation. Parking brakes and wheel chocks reduce movement, but they do not make a steep or unstable surface suitable for lifting.
Does the Process Differ for SUVs, Trucks, EVs, and AWD Vehicles?
Yes, vehicle weight, ground clearance, lift points, wheel weight, spare design, and drivetrain requirements can change the tire-changing process. The general sequence still applies, but the owner’s manual remains the controlling source.
Sport utility vehicles and pickup trucks may require a higher-capacity jack and different frame or axle lifting points. Large wheels are heavier and more difficult to control. Do not use a passenger-car jack that lacks the required capacity or lifting range.
Electric vehicles can have high-voltage battery enclosures near common lifting areas. Some also require a suspension or jack mode before lifting. Use only the marked points and approved adapters. Contact trained assistance when the lifting instructions are unclear.
All-wheel-drive vehicles can be sensitive to differences in tire circumference. A compact spare may be limited to a particular position or require moving another wheel first. Follow the manufacturer’s instructions to protect the drivetrain and maintain predictable handling.
Run-flat tires can support limited driving after pressure loss under defined conditions. Run-flat capability does not cover every form of damage. Follow the tire and vehicle manufacturer’s speed, distance, and inspection rules.
What Are the Most Common Tire-Changing Mistakes?
The most serious mistakes involve an unsafe location, unstable lifting, incorrect fastener handling, and misuse of a temporary spare. These errors can damage the vehicle or cause it to move unexpectedly.
There are 10 common mistakes to avoid:
- Stopping too close to moving traffic.
- Raising the vehicle on a slope or soft surface.
- Forgetting the parking brake or wheel chocks.
- Using an unapproved jack point.
- Removing lug nuts before lifting preparations are complete.
- Placing any part of the body beneath the vehicle.
- Cross-threading or lubricating fasteners without manufacturer approval.
- Tightening lug nuts in a circle instead of a crossing pattern.
- Guessing the final torque or spare-tire pressure.
- Driving beyond the spare tire’s marked limits.
How Long Does It Take to Change a Tire?
A prepared driver can often install a spare in about 15 to 30 minutes, but location, experience, vehicle design, weather, and stuck components can extend the task. Safety should determine the pace.
Finding tools, moving to a safer location, dealing with a wheel lock, or waiting for traffic can extend the task. Reviewing the procedure at home helps a driver locate the equipment before an emergency.
Can You Change a Tire Yourself?
Yes, many drivers can change a tire when they have the correct equipment, a safe location, and model-specific instructions. The task still requires lifting, balance, hand strength, and the ability to control a heavy wheel.
Request assistance when pain, injury, pregnancy, limited mobility, poor visibility, severe weather, heavy wheels, or unfamiliar equipment creates additional risk. Changing a tire is not a test of independence. A safe professional change is better than an unstable roadside attempt.
How Can You Prepare Before a Flat Tire Occurs?
Inspect the spare and tire-changing equipment before a trip and at regular vehicle-service intervals. Preparation prevents common roadside failures such as an empty spare, missing wheel-lock key, corroded jack, or incorrect wrench.
Check the spare-tire pressure with an accurate gauge. Confirm that the jack moves through its range and that the lug wrench fits every fastener. Keep the wheel-lock key in a consistent, accessible location. Store a flashlight, reflective vest, wheel chocks, gloves, pressure gauge, and inflator with the factory tools.
Review the owner’s manual and identify each jack point while the vehicle is parked safely. Do not lift the vehicle to practice unless the location, equipment, and procedure are suitable.
Maintain the four road tires at the pressure listed on the vehicle placard, usually located on the driver’s door jamb or nearby body pillar. Inspect tread and sidewalls for embedded objects, cuts, bulges, uneven wear, and low pressure. Proper maintenance cannot prevent every puncture, but it reduces avoidable tire problems.
More Tire-Change Guides
Prepare for a flat before it happens. These focused guides answer the practical questions that surround the 12-step process.
Build a complete, vehicle-compatible roadside kit.
TimingHow Long Does It Take?Plan for the work without rushing a safety check.
DIY decisionCan You Change It Yourself?Use a clear go-or-stop checklist before lifting.
SafetyRoadside Tire-Change SafetyChoose a safe location and know when to call for help.
TerminologyChange a Tire vs. Replace a TireUnderstand a wheel swap, tire repair, and replacement.
Frequently Asked Questions
Which Way Do Lug Nuts Loosen?
Most passenger-vehicle lug nuts loosen counterclockwise and tighten clockwise. Keep the wrench square to the fastener and loosen each nut slightly before raising the vehicle. Check the owner’s manual when the fastener has unusual markings or does not respond normally because some specialized vehicles can use different threads.
How High Should You Jack Up a Car to Change a Tire?
Raise the vehicle only high enough for the inflated spare tire to clear the ground and slide onto the hub. The spare may be taller than the flat tire. Excess lifting reduces stability and is unnecessary. Keep every body part outside the area beneath the vehicle.
Where Should a Jack Be Placed?
Place the jack at the reinforced point identified in the owner’s manual. A passenger car often uses a marked pinch-weld section near the affected wheel, while a truck or sport utility vehicle may use a frame or axle point. Never guess based only on appearance.
Can You Drive on a Flat Tire to Reach a Safer Location?
Drive only the minimum distance needed to leave an immediate danger, and move at very low speed. Even a short distance can destroy the tire and damage the wheel. Stop sooner when the vehicle becomes hard to control, the tire separates, or a safe pull-off is already available.
Can a Full-Size Spare Be Used Like a Regular Tire?
A matching full-size spare may permit normal use only when its size, type, pressure, condition, load rating, and manufacturer instructions match the vehicle’s requirements. A full-size spare still needs inspection for age, tread, damage, and compatibility before normal driving.
Should Lug Nuts Be Checked After Driving?
Follow the vehicle or wheel manufacturer’s instructions for checking torque after installation. Many service providers recommend a torque check after a short driving interval. Stop immediately when the wheel vibrates, knocks, shifts, or has a missing or visibly loose fastener.
Can a Compact Spare Be Installed on Any Wheel Position?
No, some vehicles restrict compact spares to a specific axle or require another wheel to be moved first. Placement can matter on front-wheel-drive, all-wheel-drive, and vehicles with different front and rear tire sizes. Follow the owner’s manual rather than applying one rule to every car.
What Should You Do When the Spare Tire Is Flat?
Do not install or drive on a spare that lacks safe pressure or cannot hold air. A portable inflator may restore pressure when the tire is undamaged and the manufacturer permits inflation. Request roadside assistance when the spare is cracked, punctured, separated, or otherwise unsafe.
Change a Tire Safely and Complete the Repair
A safe tire change depends on a stable location, correct tools, approved jack placement, proper fastener tightening, and compliance with the spare tire’s limits. Stop the process whenever one of these conditions cannot be met.
The spare tire provides time to reach professional service. Have the damaged tire inspected, confirm the final wheel torque, and restore the normal wheel and tire as soon as practical. Regular checks of the spare, jack, wrench, wheel-lock key, and tire pressures keep the vehicle ready for the next trip.