
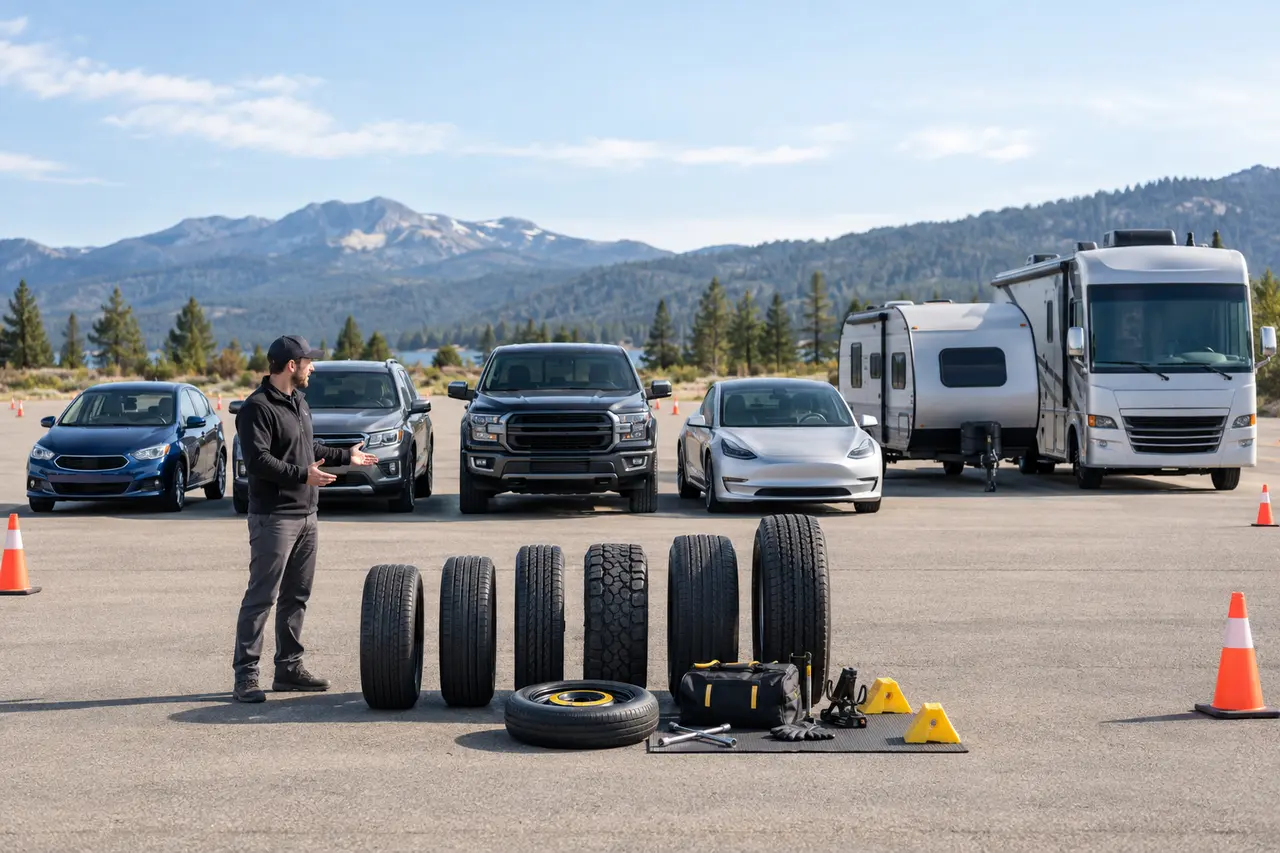
Start with the guide for the exact vehicle type, then confirm every step in its current owner's manual. A procedure that works for a small gasoline car may be unsafe for a heavy SUV, EV battery floor, pickup frame, trailer, or motorhome.
These guides explain the differences that matter before a wheel is loosened or a vehicle is lifted. They cover equipment capacity, lift points, suspension settings, wheel weight, drivetrain matching, spare placement, towing, and situations that need professional help.
Which Vehicle Guide Should You Choose?
Vehicle-specific instructions always control. Match the model year, trim, wheel package, axle, suspension, tire system, load, and attached trailer before work begins.
Begin with the vehicle owner’s manual and the exact equipment in the car. Tire systems vary by model, trim, wheel package, drivetrain, and model year. General advice helps you ask the right questions, but the manufacturer’s lift points, pressure, torque, spare placement, and mobility limits control the task.
Account for greater weight, lift height, larger wheels, cargo, drivetrain rules, and the SUV’s exact jack points.
Pickup truck tire guideHow to Change a Pickup Truck TireUse truck-rated equipment and account for high weight, long jack travel, underbed spare storage, and large wheel assemblies.
Electric vehicle tire guideHow to Change an EV TireProtect the high-voltage battery and use only the EV’s approved lift points, equipment, settings, and tire-mobility system.
Tesla tire guideHow to Change a Tesla TireUse the owner’s manual for the exact Tesla model and keep every jack or lift pad at the designated body lift point.
All-wheel-drive tire guideChanging a Tire on an AWD CarProtect the drivetrain by following the exact spare, axle, tire-size, and circumference limits for the AWD system.
Trailer tire-changing guideHow to Change a Trailer TireKeep the trailer hitched when directed, secure every wheel, use the approved lift point, and control the load before raising it.
RV tire safety guideHow to Change an RV Tire SafelyTreat motorhome weight, large wheels, dual tires, air suspension, and leveling systems as heavy-vehicle work.
How Should You Use These Guides?
Choose the page that matches the vehicle or tire condition before unloading tools. Read the direct answer and stop conditions first. Then compare the available spare, jack, wrench, pressure equipment, and working area with the checklist. Do not begin a lift until the complete plan is clear.
One guide may lead to another. A flat tire can involve a missing spare, a stuck fastener, a wheel lock, a damaged rim, a pressure warning, or a vehicle-specific lifting rule. Follow those links instead of forcing the normal sequence through a problem.
What Makes a Tire Task Safe?
Safe work needs firm level ground, distance from traffic, good light, stable weather, a secured vehicle, compatible equipment, and enough physical control to handle the tools and wheel. Hazard lights and warning devices improve visibility, but they do not create a protected work zone.
Apply the parking brake, select the manual-specified gear, and place proper wheel chocks. Keep people away from the raised corner. Never enter the space below a vehicle held by an emergency jack. Stop for leaning, sinking, slipping, cracked tools, damaged lift points, or unexpected movement.
What Equipment Should Be Checked?
| Item | Check | Reason |
|---|---|---|
| Owner’s manual | Correct model and wheel procedure | Defines lift points and limits |
| Spare or mobility kit | Compatibility, pressure, condition, and date | Determines whether mobility can be restored |
| Jack | Capacity, range, saddle, base, and operation | Supports a controlled lift |
| Wrench and key | Exact fit and complete engagement | Prevents rounded fasteners |
| Pressure equipment | Gauge range and inflator condition | Confirms usable cold pressure |
| Safety kit | Chocks, light, gloves, visibility gear, phone | Supports setup and communication |
What Should Stop the Job?
Stop when the vehicle is beside close traffic, on a curve, bridge, tunnel, narrow shoulder, soft ground, ice, deep gravel, or a slope. Stop when visibility is poor, weather is severe, or the driver cannot work without pain or loss of balance.
Mechanical stop signs include a missing wheel-lock key, seized or rounded fastener, wheel stuck on the hub, incompatible spare, flat spare, jack that leaks or leans, wheel or suspension damage, multiple flat tires, and collision damage. These conditions need different tools or professional service.
What Happens After Temporary Mobility Is Restored?
A compact spare, run-flat, or sealant kit is a short-term way to reach service. Read the exact speed, distance, axle, load, towing, and weather limits. Drive smoothly, choose the shortest practical route, and stop for vibration, pulling, rubbing, noise, or new warning lights.
At the service location, request an internal tire inspection. Confirm whether the tire can be repaired, whether the wheel and valve are sound, and whether the TPMS sensor or suspension was affected. Have the road wheel installed to the stated torque and return a ready spare or renewed kit to storage.
How Should You Compare Advice With the Owner's Manual?
Use each article as a clear starting point, then open the manual for the exact model year and equipment. Find the tire-changing, jacking, towing, pressure, and temporary-mobility sections. Match the diagram to the vehicle instead of choosing a point because it looks strong. Record the stated fastener torque and spare restrictions before tools come out.
If a guide and the manual appear different, pause and confirm that you have the correct manual, trim, wheel package, and market version. Vehicle instructions take priority. A dealer, tire professional, or roadside provider can clarify an unusual spare, suspension system, wheel lock, EV lift pad, trailer setup, or heavy-vehicle requirement.
How Do You Know the Job Is Finished?
The vehicle should be fully lowered, every fastener should have its stated final torque, and the installed tire should have the correct cold pressure. Remove the chocks only when the tools, damaged wheel, warning devices, and loose cargo are secured. Check that no part rubs and that no warning, vibration, pulling, odor, or sound appears as the vehicle begins to move.
Temporary mobility is only the first result. The job is complete after the damaged tire and wheel are inspected, the normal approved tire is restored, the spare or repair kit is made ready again, and any fastener, valve, sensor, carrier, jack, or tool problem is corrected.
How Can You Prevent a Roadside Surprise?
Check tire and spare pressure monthly when cold. Inspect tread and sidewalls, learn the warning lights, test the inflator, check sealant expiration, find the wheel-lock key, and operate the unloaded jack as its instructions allow. Verify the kit before long or remote trips.
Practice reading the manual and locating each item at home. Keep cargo from blocking the spare. Save roadside coverage details and key phone numbers offline. Good preparation shortens the response while keeping safety ahead of speed.
Where Should You Start?
Open the guide that matches the current condition. If the vehicle is exposed to traffic or the problem is unclear, start with roadside tire-change safety. For the standard procedure, use the main tire-change guide.
Quick answers
Frequently Asked Questions
Why do vehicle types need different guides?
Weight, lift points, wheels, suspension, drivetrain, and spare systems differ..
Can the same jack serve every vehicle?
No. Capacity, range, collapsed height, saddle, and ground conditions must match.
Which vehicles often have no spare?
Many EVs and newer vehicles use run-flats or mobility kits, but equipment varies by model..
Why does AWD tire matching matter?
Different rolling sizes can affect the AWD system..
When should professional service be used?
Use it for traffic exposure, heavy vehicles, inadequate equipment, uncertain lift points, or damaged parts..