
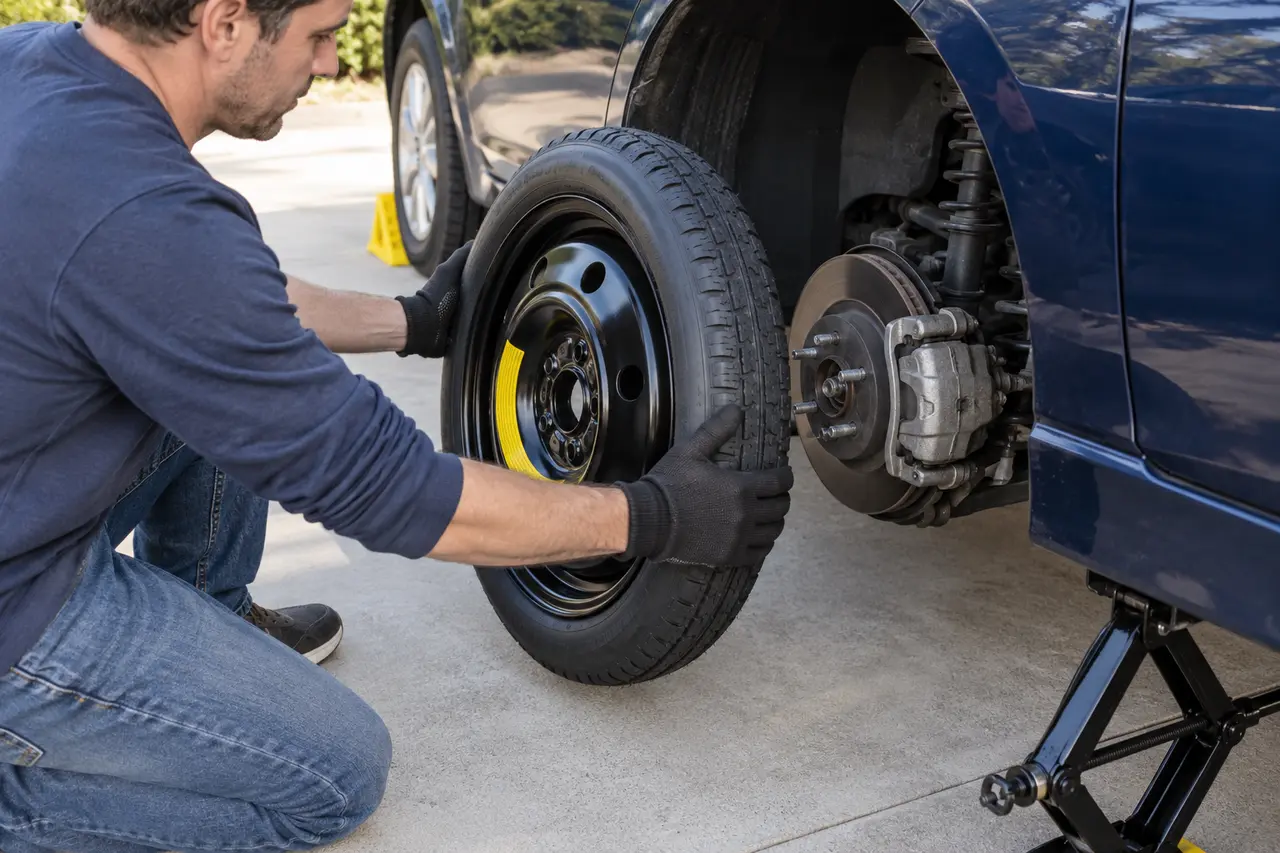
To put on a spare tire, park safely, secure and chock the vehicle, loosen the wheel fasteners, lift at the approved point, remove the flat wheel, mount the spare, and tighten in a crossing pattern. Apply the specified final torque, check pressure, and follow the spare’s speed, distance, load, and placement limits.
The roadside task changes the complete wheel and tire assembly. It does not remove rubber from the rim. The owner’s manual controls lift points, spare compatibility, fastener type, torque, and temporary restrictions.
What Does the Owner’s Manual Control?
Use the exact changing-a-wheel section. Some vehicles require a jack mode, prohibit a compact spare on a certain axle, or use wheel bolts that need an alignment guide. Do not begin until these details are clear.
The manual identifies compatible spare types, storage and release instructions, approved jack points, fastener torque, and temporary-use limits. The markings on the spare provide additional pressure, speed, load, and service information. Use the more restrictive instruction when required and seek manufacturer guidance when information appears inconsistent.
Which Spare-Tire Type Is Involved?
Identify whether the vehicle has a compact temporary spare, full-size temporary spare, matching full-size spare, collapsible spare, or no spare. Each system has different preparation and travel rules.
| Factor | What to check | Why it matters |
|---|---|---|
| Location | Firm level ground away from traffic | Provides stable lifting and working space |
| Spare condition | Correct pressure and no structural damage | Determines whether it can carry the vehicle |
| Jack point | Exact manual-approved location | Prevents body damage and instability |
| Fasteners | Correct nuts or bolts and wheel-lock key | Secures the wheel to the hub |
| Final torque | Manufacturer value and crossing pattern | Provides correct wheel clamping |
| Travel limits | Sidewall and manual restrictions | Controls safe temporary operation |
How Do You Check Compatibility?
Compare the spare identifier and manual. Confirm it is intended for the vehicle and permitted at the affected position. Some front-wheel-drive or all-wheel-drive vehicles require a normal rear wheel to move forward and the compact spare to go on the rear.
A spare supplied for another vehicle may have the wrong bolt pattern, center bore, offset, overall diameter, load capacity, brake clearance, or tire construction. Do not force a wheel onto the hub or substitute wheel hardware. Use only a spare and fasteners approved for the vehicle and required position.
How Do You Inspect the Spare Before Use?
Measure cold pressure before lifting. Check age, tread, cracking, bulges, bead condition, valve, and wheel. A spare can lose pressure or age while stored even when never used.
Check pressure when the tire is cold, meaning it has not recently been driven and heated. Inspect both sidewalls, the tread, valve, bead area, and wheel. Do not install a spare with severe cracking, a bulge, exposed reinforcement, separation, a damaged wheel, or pressure that cannot be maintained.
What Is the Correct Procedure?
Turn on hazards, apply the parking brake, select the specified gear, and chock the opposite wheel. Remove tools and spare. Loosen fasteners slightly, jack at the approved point, remove the wheel, install the spare, hand-start fasteners, snug across the center, lower, and torque.
Prepare the spare and tools before raising the vehicle. Keep the parking brake applied and wheel chocks positioned as directed. Lift only at the approved point. Start fasteners carefully, snug them in a crossing pattern, lower as specified, and apply final torque with the correct specification.
What Driving Limits Apply?
Read the sidewall before driving. A compact spare is normally temporary and often limited to 50 mph or 80 km/h, but the exact limit can be lower or otherwise different. Use the shortest practical route to service.
Compact spares commonly carry reduced limits, but the exact number is vehicle and tire specific. Many are marked for no more than 50 mph or 80 km/h, while permitted distance can vary. Drive smoothly, avoid hard acceleration and braking, and travel directly to professional service. Stop for vibration, pulling, noise, pressure loss, or unstable handling.
How Do Weather, Load, and Road Conditions Matter?
Wet, icy, rough, or steep roads can make the handling difference more significant. A compact spare can reduce traction and clearance. Do not assume stability-control or all-wheel-drive systems eliminate the mismatch.
A temporary spare changes the vehicle’s available traction and may affect ground clearance. Reduce load when the instructions require it. Avoid towing, snow chains, rough roads, deep water, high-speed travel, and long detours unless the manufacturer specifically permits them with the installed spare.
What Mistakes Should You Avoid?
- Do not work beside close traffic: move or call for help.
- Do not use an unapproved jack point: body damage and a fall can result.
- Do not go beneath the car: an emergency jack is not a support stand.
- Do not install an unpressurized spare: check before lifting.
- Do not tighten around the circle: use the specified crossing pattern.
- Do not treat a donut as permanent: arrange normal tire service promptly.
A spare is part of a vehicle system, not a universal wheel. Guessing pressure, fit, placement, or travel limits can damage the tire, wheel, drivetrain, brakes, or body. Stop when the specified setup cannot be confirmed.
When Is Professional Help Required?
Request service when the location is unsafe, tools or wheel-lock key are missing, the spare is damaged or flat, fasteners will not move, the wheel is stuck, the jack is unstable, or the vehicle has collision or suspension damage.
Roadside assistance can install a usable spare when the location permits. Towing is appropriate when there is no compatible spare, the mobility kit cannot address the damage, multiple tires are affected, the wheel or suspension is damaged, or the vehicle cannot be lifted safely.
What Should Happen After the Spare Is Used?
Drive directly to a tire facility within the stated limits. Have the damaged tire inspected internally, confirm wheel torque, restore the normal wheel, and return a serviceable spare and complete tool kit to storage.
Have the normal tire removed and inspected internally when repair is considered. Restore a compatible road wheel as soon as practical. Then check the spare, correct its pressure, replace it if damaged or aged out, and return every tool to secure storage.
How Do You Keep the Spare Ready?
Check spare pressure monthly when cold and before long trips. Practice locating the tools and jack points. Keep a gauge, inflator, chocks, light, gloves, and roadside contact details available.
Include the spare in routine tire checks. NHTSA advises checking all tires, including the spare, at least monthly when cold. Inspect before long trips and when seasons change. Confirm that the jack, lug wrench, wheel-lock key, pressure gauge, and inflator remain present and functional.
Which Spare-Tire Guides Are Related?
These pages explain the connected decisions around storage, installation, pressure, placement, age, and limited travel:
Use the complete tools checklist and roadside safety guide before beginning. A serviceable spare helps only when the vehicle, equipment, driver, and location are ready.
Quick answers
Frequently Asked Questions
How high should the car be lifted for a spare?
Raise only enough for the inflated spare to clear the ground and fit onto the hub..
Do lug nuts need to be loosened before lifting?
Yes. Break them loose slightly while the tire remains on the ground, but do not remove them.
Which pattern tightens a spare tire?
Use the manufacturer-specified star or crisscross pattern across the wheel center..
Can you put a spare on without checking pressure?
No. A stored spare can lose air and should be checked cold before installation.
What should you do after installing a spare?
Follow its driving limits and go directly to professional tire service..