
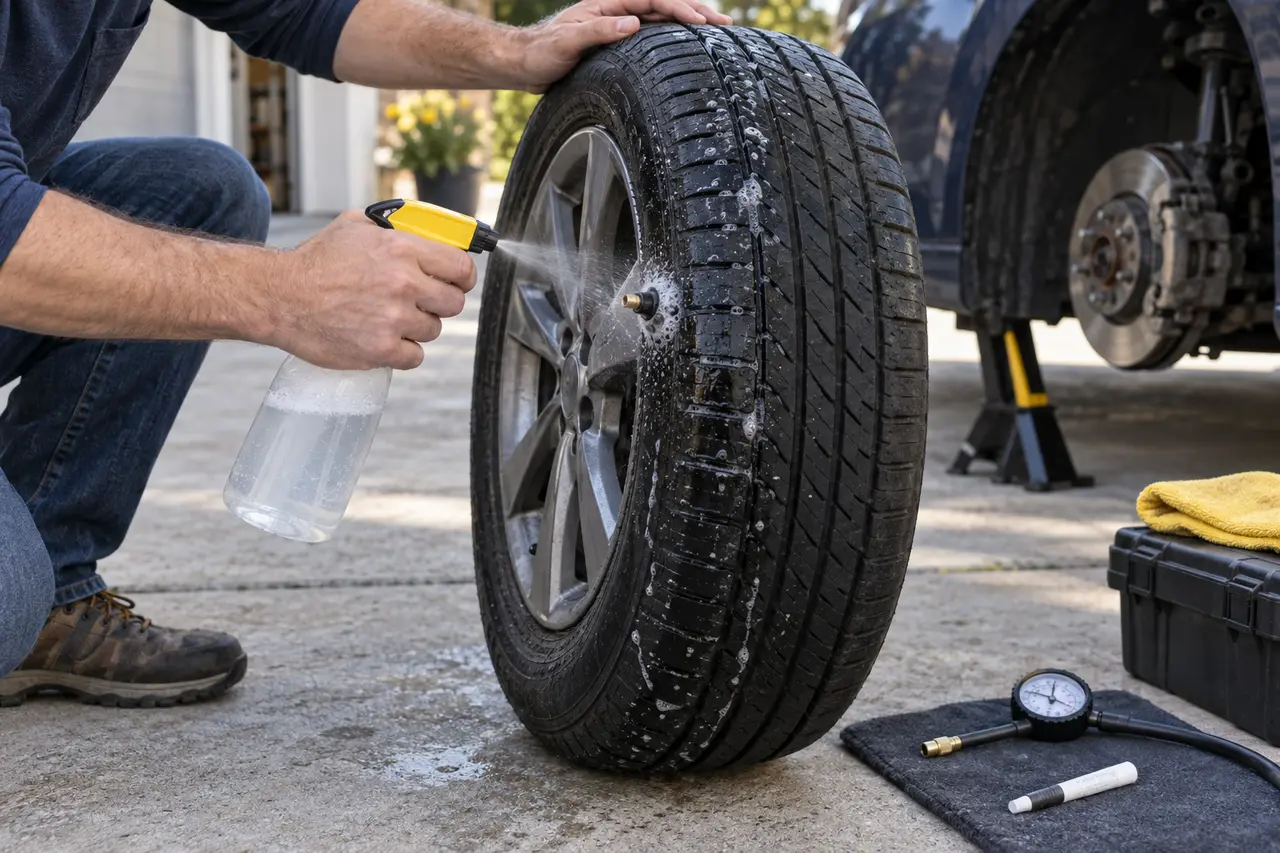
To find a slow tire leak, record the cold pressure, inspect the tread and sidewalls, and use an approved leak-detection solution on the tread, valve, and bead. Growing bubbles identify escaping air. Mark the spot, leave embedded objects in place, and have the tire removed for inspection before deciding on repair.
How Do You Know the Tire Has a Slow Leak?
A slow leak usually appears as repeated pressure loss over days or weeks. One tire may trigger the TPMS warning before the others, need frequent top-ups, or look low after the vehicle sits. The car may also pull slightly or feel less precise, but pressure must be measured because appearance and handling are not reliable gauges.
Temperature affects every tire, so compare all four readings. If they drop by a similar amount during colder weather, temperature may be the main cause. If one tire loses more or continues to fall after the weather stabilizes, inspect that wheel assembly for a leak.
What Can Cause a Slow Tire Leak?
| Leak location | Common clue | What it may require |
|---|---|---|
| Tread puncture | Nail, screw, or bubbles in one tread block | Internal inspection and eligible combination repair |
| Valve core | Bubbles at the valve opening | Correct core service or replacement |
| Valve stem or TPMS seal | Bubbles at the stem base | Compatible service parts and correct torque |
| Tire bead | Bubbles along the rim edge | Demounting and inspection of bead and wheel |
| Wheel | Leak returns after bead service or follows an impact | Crack, bend, or corrosion assessment |
| Previous repair | Bubbles at or beside an old repair | Repair-policy review, often replacement |
Step 1: Record Cold Tire Pressure
Park for at least three hours when practical and use an accurate gauge. Write down the pressure for each road tire and the spare. Compare road-tire readings with the Tire and Loading Information Label on the driver's door area or the owner manual.
Recheck the same tire under similar cold conditions. Note the date, outside temperature, pressure, and whether the vehicle was driven. This record separates a repeat leak from a one-time measurement error.
Step 2: Inspect the Tread and Sidewalls
Use good light and rotate the tire only when the vehicle can be moved safely. Look for a nail, screw, cut, split, bulge, exposed cord, damaged valve, or bent rim. Do not crawl under a vehicle or place any part of your body beneath one supported by an emergency jack.
Leave an embedded object in place and mark its location. Pulling it out may open the hole and release the remaining air quickly. A bulge, deep sidewall cut, exposed cord, or separated tread means the tire should not be driven or inflated for continued service.
Step 3: Use Leak-Detection Solution
- 1Inflate only when appropriate
If there is no visible structural damage, bring the tire to the vehicle's recommended pressure so escaping air can be detected.
- 2Test the valve
Apply solution to the valve opening and around the stem base. A growing cluster of bubbles indicates a leak.
- 3Test the tread
Cover small sections, including grooves and around any object, and wait for bubbles that continue to grow.
- 4Test the bead
Apply solution where the tire meets the wheel on both sides when safely accessible.
- 5Mark the location
Use chalk or removable marker and record whether the bubbles appeared at the tread, valve, bead, or wheel.
Use a tire-safe commercial leak detector or mild soap solution that can be rinsed away. Do not use a flame, high-pressure blast, or aggressive chemical. Do not submerge a mounted wheel when lifting or handling it would be unsafe.
What If You Cannot Find Bubbles?
The leak may appear only under vehicle load, at a certain wheel position, or during temperature change. It may also be too small for a quick surface test. A shop can remove the wheel, test the complete assembly, demount the tire, inspect the inner liner, and check the wheel for cracks or runout.
Tell the technician how quickly pressure falls, whether the tire was recently installed, repaired, or hit a pothole, and whether the valve contains a TPMS sensor. These details help narrow the test.
Can the Slow Leak Be Repaired?
A small puncture in the repairable tread area may qualify. The tire must be removed and checked for liner, cord, sidewall, bead, and underinflation damage. USTMA guidance requires a proper repair to fill the puncture injury and seal the inner liner.
Sidewall or shoulder injuries, structural damage, unsafe previous repairs, and damage caused by driving flat generally require replacement. A valve or bead leak may be serviceable only after the underlying part and wheel condition are identified.
How Can You Prevent Repeat Pressure Loss?
Check pressure monthly when cold and before long trips. NHTSA TireWise recommends checking all tires, including the spare, at least once a month. Keep valve caps installed, avoid overloading, respond to TPMS warnings, and have pothole or curb impacts inspected when the vehicle begins to vibrate or lose pressure.
Related Flat-Tire Guides
Quick answers
Frequently Asked Questions
How do you find a slow tire leak at home?
Check cold pressure, inspect the tread and sidewalls, and apply approved leak-detection solution to the tread, valve, and bead while watching for growing bubbles.
Can a tire leak without a nail?
Yes. Air can escape through a valve, bead seal, cracked wheel, previous repair, or structural damage.
Should you pull a nail out of a leaking tire?
No. Leave it in place until the tire can be serviced because removing it may make the leak much faster.
Why does a tire lose air only in cold weather?
Lower temperature reduces pressure and can expose a marginal bead, valve, wheel, or puncture leak. Repeated loss still needs inspection.
Can tire sealant fix a slow leak permanently?
No. A mobility sealant may provide temporary movement for an eligible puncture, but it does not replace internal inspection and a proper repair.