
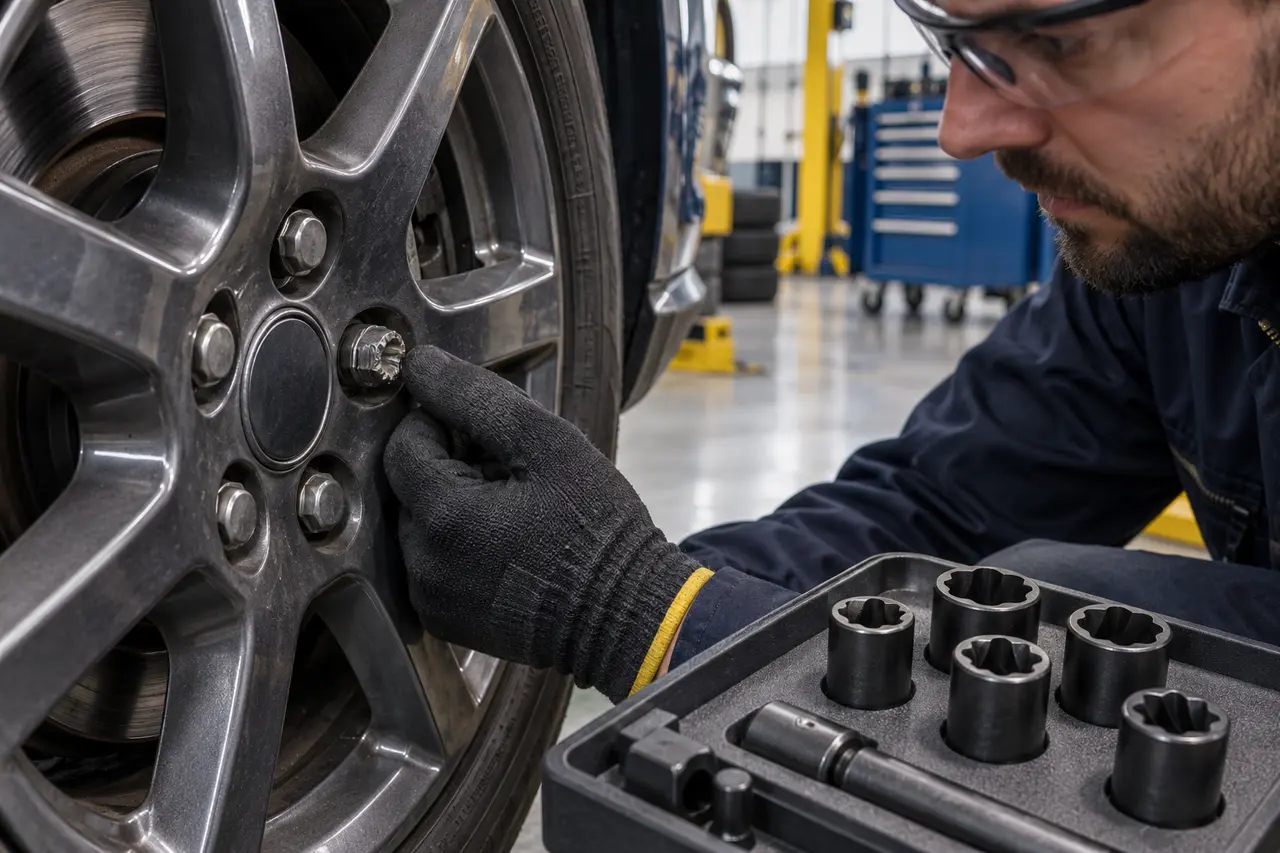
Stop turning a stripped lug nut with the standard wrench because repeated slipping removes more metal. Use a purpose-built extractor or professional service, then replace the damaged nut and inspect the stud or wheel bolt before reassembly.
A stripped lug nut can mean rounded outer corners, damaged internal threads, or both. Each condition requires a different repair. The wheel should not return to normal service until the clamping hardware is sound.
What Should You Do First?
Keep the vehicle grounded and secure. Inspect the fastener with good light. Determine whether the outside is rounded, the nut spins without releasing, or the stud turns with it. Do not raise the vehicle until a safe removal plan is available.
Keep the vehicle on firm, level ground away from traffic. Apply the parking brake, use the correct transmission position, and place wheel chocks. Do not enter the space beneath a vehicle supported only by an emergency jack. If the car is exposed to moving traffic, stay protected and request roadside assistance.
What Commonly Causes This Problem?
Damage usually develops from tool mismatch, incorrect installation, corrosion, or excessive force.
| Possible cause | What you may notice | Safe response |
|---|---|---|
| Rounded exterior | Hex corners appear smooth | Use a dedicated extractor of the correct size |
| Cross-threaded nut | Fastener binds during removal | Expect stud or bolt inspection and replacement |
| Spinning stud | Nut and stud rotate together | Professional access from the hub side may be required |
| Swollen metal cap | Socket will not fit fully | Use a service-size socket and replace the nut |
| Overtorque | Fastener is extremely tight | Controlled extraction may be required |
| Wrong tool | Twelve-point or loose socket slips | Stop and change to proper six-point equipment |
| Corrosion | Rust fills edges or threads | Use controlled corrosion treatment and extraction |
How Can You Diagnose It Without Causing More Damage?
Mark the nut and stud position, then apply only enough controlled movement to identify whether the whole stud rotates. Examine neighboring hardware because the same prior installation may have affected it. Do not hammer a standard socket on without an extraction plan that protects the wheel.
Use adequate lighting and inspect from beside the vehicle. Compare the tool, fastener, jack, spare, or wheel position with the owner’s manual. Stop the test when a component slips, deforms, cracks, leans, binds, leaks, or requires uncontrolled force. A diagnosis is useful only when it does not turn a manageable wheel problem into damaged hardware or an unstable vehicle.
What Is the Safest Resolution?
Spiral extraction sockets are designed to bite into a rounded exterior. Select the size and follow the tool instructions. A technician may need to drill, split, weld, or access the stud from behind, but these methods can damage the wheel, bearing, brake, or finish when performed incorrectly.
Work in small, controlled stages and recheck the setup after each change. Use only tools designed for the component. Do not substitute a close socket size, an undersized jack, stacked blocks, improvised extensions, or force applied from an unstable body position. Follow model-specific instructions whenever they differ from this general guidance.
Can You Solve It at the Roadside?
A mildly damaged exterior may be removable with a carried extractor in a safe area. A spinning stud, deeply rounded nut, recessed wheel design, or cross-threaded fastener is normally a workshop or tow situation.
A parking area or driveway permits more controlled assessment than a shoulder. Road noise, passing vehicles, poor light, rain, snow, wind, soft ground, and limited working space reduce the margin for error. A solution that may be reasonable in a garage can be inappropriate beside traffic. Safety determines whether the task continues.
Which Tools May Be Needed?
Possible tools include a lug-nut extractor set, correct breaker bar, protective socket guide, penetrating product, replacement hardware, torque wrench, and professional drilling or welding equipment. Extraction tools are sacrificial and size-specific.
Inspect every tool before loading it. The socket must fit fully, the jack must match the lift point and load, and the spare must be compatible and inflated. Keep the wheel-lock key with the lug wrench. Review the emergency tire change kit before a trip rather than assembling equipment during a breakdown.
What Should You Avoid?
- Do not keep using the loose wrench: every slip removes more corner material.
- Do not hammer near an inflated tire carelessly: impacts can damage the wheel and tire.
- Do not use a cold chisel beside the wheel: it can slip into the rim or brake area.
- Do not apply open flame: tires, finishes, seals, and brakes can be damaged.
- Do not reuse damaged hardware: a distorted nut or stud cannot provide reliable clamping.
- Do not install fewer fasteners: the wheel needs all required hardware.
Improvised force can damage wheel studs, bolts, nuts, wheels, brakes, lift points, or body structure. It can also move the vehicle off the jack. When an action feels uncontrolled, stop and change the plan rather than increasing force.
When Should You Call Roadside Assistance?
Request help when the vehicle is roadside, the nut is deeply recessed, an extractor will not bite, the stud spins, drilling is required, or the wheel finish and surrounding parts cannot be protected.
Tell the provider the exact location, vehicle model, affected wheel, spare status, wheel-lock status, and visible damage. State traffic exposure, collision damage, smoke, leaking fluid, or an unstable vehicle first. A provider may install a usable spare, use specialized removal equipment, or tow the vehicle to a tire or repair facility.
What Happens After the Immediate Problem Is Solved?
Replace the nut and any damaged stud or wheel bolt with the correct part. Inspect the wheel seat and hub. Hand-start all fasteners, tighten in stages and a crossing pattern, then apply the specified torque.
Final wheel installation requires clean mating surfaces, sound fasteners, the specified tightening sequence, and the manufacturer’s torque. Check spare pressure and follow every temporary-spare speed, distance, and position limit. Have uncertain damage inspected before returning to normal driving.
How Can You Prevent the Same Problem?
Use an exact six-point socket for removal, hand-start fasteners, keep threads in specified condition, and finish with a calibrated torque wrench. Replace swollen capped nuts before they become impossible to service.
Practice the equipment on private, level ground. Confirm wrench fit, wheel-lock-key location, jack operation, spare pressure, and lift points. Regular preparation reduces surprises, but it does not justify roadside work when the location is unsafe.
Which Related Tire Problems Should You Understand?
A wheel change can stop at several connected points. Use these guides to identify the next safe action:
Return to the complete tire-change guide only after this problem is resolved. The normal sequence should not continue with damaged parts, missing equipment, an unstable lift, or a wheel that cannot be secured correctly.
Quick answers
Frequently Asked Questions
Can you drive with one stripped lug nut?
Do not assume the wheel is safe with damaged or missing hardware. Have it inspected and repaired before normal driving.
Will a smaller socket remove a stripped lug nut?
Hammering on a random smaller socket can damage the wheel and tool. Use a purpose-built extractor sized for the fastener.
Does a stripped lug nut mean the stud is damaged?
Not always, but internal thread damage, cross-threading, or a spinning stud requires inspection and often replacement..
Can a tire shop remove a stripped lug nut?
Yes. Tire and repair shops commonly have extraction sockets and procedures for damaged wheel hardware.
Should a removed stripped lug nut be reused?
No. Replace damaged fasteners with the correct specification and inspect mating threads.