
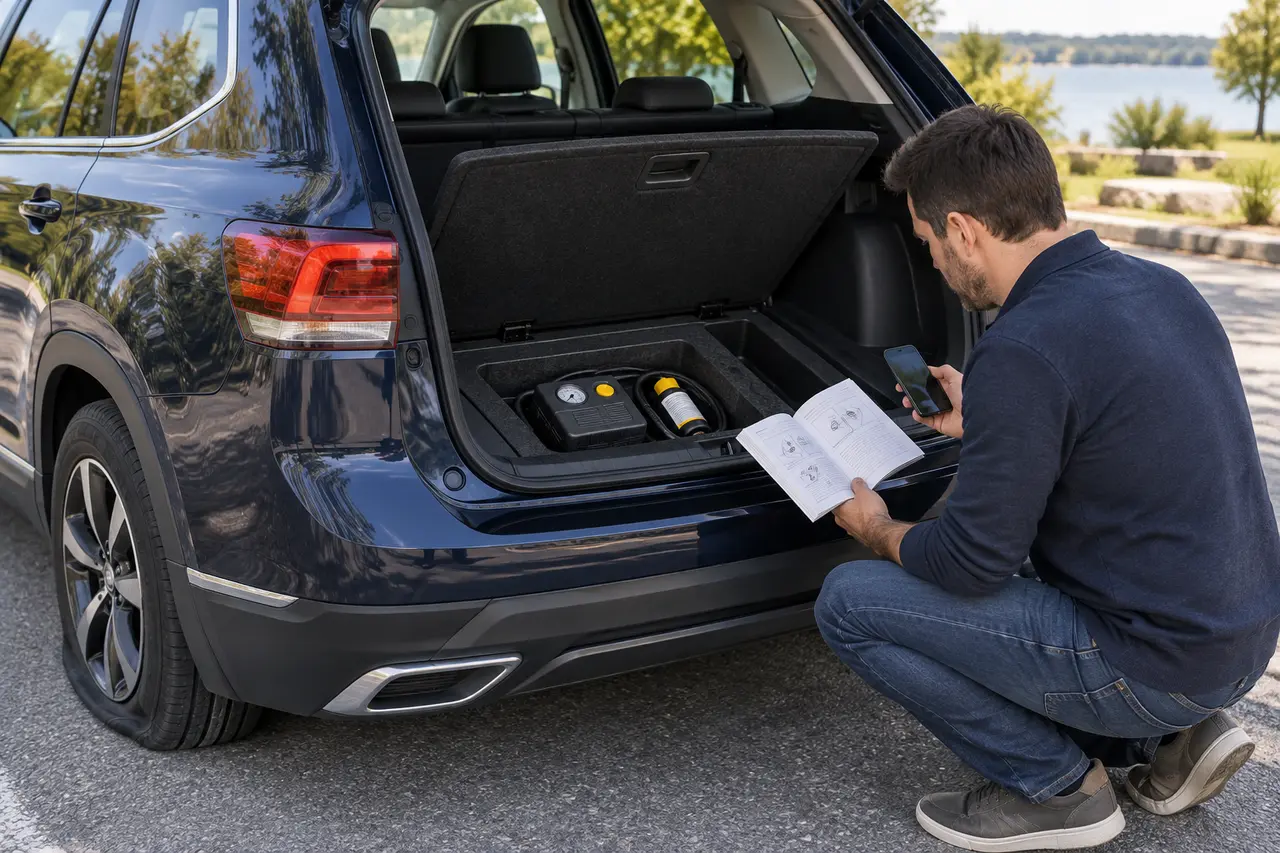
If the vehicle has no spare, move to a safe location and check for a run-flat tire or factory sealant-and-inflator kit. Use that system only within its instructions. Call roadside assistance or request a tow for sidewall damage, a large puncture, wheel damage, or an ineligible tire.
Modern vehicles may omit spares to save space or weight. The alternative system restores limited mobility in specific conditions, not every tire failure.
What Should You Do First?
Inspect only from a protected position. Do not remove an embedded object. Read the mobility-kit label and manual. Check whether the damage is in the tread, sidewall, bead, or wheel and whether the tire remains seated.
Keep the vehicle on firm, level ground away from traffic. Apply the parking brake, use the correct transmission position, and place wheel chocks. Do not enter the space beneath a vehicle supported only by an emergency jack. If the car is exposed to moving traffic, stay protected and request roadside assistance.
What Commonly Causes This Problem?
The correct response depends more on damage type and vehicle equipment than on how quickly pressure was lost.
| Possible cause | What you may notice | Safe response |
|---|---|---|
| Small tread puncture | Object or small leak in central tread | Mobility kit may be permitted |
| Sidewall cut | Slice, bulge, or torn sidewall | Do not seal; tow the vehicle |
| Tire off rim | Bead no longer seated | Professional recovery required |
| Bent or cracked wheel | Impact damage or major air loss | Tow for wheel inspection |
| Expired sealant | Date has passed or container damaged | Do not rely on it; request help |
| Run-flat within limits | Sidewall marking and warning system apply | Follow exact speed and distance limits |
| Multiple damaged tires | More than one tire is unusable | Tow or specialized roadside service |
How Can You Diagnose It Without Causing More Damage?
Look for visible damage without crawling under the car. Check the tire-pressure warning, sidewall, tread, and wheel. A tire can have internal damage after being driven underinflated even when the exterior looks normal. The final repair decision requires removal and internal inspection.
Use adequate lighting and inspect from beside the vehicle. Compare the tool, fastener, jack, spare, or wheel position with the owner’s manual. Stop the test when a component slips, deforms, cracks, leans, binds, leaks, or requires uncontrolled force. A diagnosis is useful only when it does not turn a manageable wheel problem into damaged hardware or an unstable vehicle.
What Is the Safest Resolution?
For an eligible tread puncture, follow the factory kit sequence and pressure limits. Sealant is temporary and the tire needs prompt inspection. For a permitted run-flat condition, reduce speed and travel only within the stated distance. Otherwise arrange towing.
Work in small, controlled stages and recheck the setup after each change. Use only tools designed for the component. Do not substitute a close socket size, an undersized jack, stacked blocks, improvised extensions, or force applied from an unstable body position. Follow model-specific instructions whenever they differ from this general guidance.
Can You Solve It at the Roadside?
Use the kit only where remaining outside the vehicle is safe. On an exposed shoulder, call for help even when sealant is available. Tell the provider that no spare is carried so the correct vehicle or tow equipment is dispatched.
A parking area or driveway permits more controlled assessment than a shoulder. Road noise, passing vehicles, poor light, rain, snow, wind, soft ground, and limited working space reduce the margin for error. A solution that may be reasonable in a garage can be inappropriate beside traffic. Safety determines whether the task continues.
Which Tools May Be Needed?
The system may include an inflator, sealant bottle, hose, valve tool, pressure gauge, tow eye, and instructions. Check sealant expiration and inflator power connection before travel.
Inspect every tool before loading it. The socket must fit fully, the jack must match the lift point and load, and the spare must be compatible and inflated. Keep the wheel-lock key with the lug wrench. Review the emergency tire change kit before a trip rather than assembling equipment during a breakdown.
What Should You Avoid?
- Do not seal sidewall damage: mobility sealant is generally limited to specified tread punctures.
- Do not exceed run-flat limits: heat and structural damage can increase.
- Do not keep inflating a damaged tire: separation or wheel damage requires service.
- Do not remove the puncturing object: unless the kit instructions specifically direct it.
- Do not assume sealant is permanent: arrange internal inspection promptly.
- Do not tow incorrectly: drivetrain and EV requirements vary.
Improvised force can damage wheel studs, bolts, nuts, wheels, brakes, lift points, or body structure. It can also move the vehicle off the jack. When an action feels uncontrolled, stop and change the plan rather than increasing force.
When Should You Call Roadside Assistance?
Call when the kit is missing or expired, the puncture is outside its repair area, the tire will not hold pressure, the wheel is damaged, more than one tire is affected, or run-flat travel limits have been reached.
Tell the provider the exact location, vehicle model, affected wheel, spare status, wheel-lock status, and visible damage. State traffic exposure, collision damage, smoke, leaking fluid, or an unstable vehicle first. A provider may install a usable spare, use specialized removal equipment, or tow the vehicle to a tire or repair facility.
What Happens After the Immediate Problem Is Solved?
Tell the tire technician which sealant was used and how far the tire traveled while low. Inspect the pressure-monitoring component, valve, tire interior, and wheel. Replace the kit canister after use.
Final wheel installation requires clean mating surfaces, sound fasteners, the specified tightening sequence, and the manufacturer’s torque. Check spare pressure and follow every temporary-spare speed, distance, and position limit. Have uncertain damage inspected before returning to normal driving.
How Can You Prevent the Same Problem?
Learn whether the car has a spare, mobility kit, or run-flat tires. Check kit expiration, tire pressure, provider coverage, and towing requirements before long trips. Consider an approved spare kit only when the vehicle manufacturer supports it.
Practice the equipment on private, level ground. Confirm wrench fit, wheel-lock-key location, jack operation, spare pressure, and lift points. Regular preparation reduces surprises, but it does not justify roadside work when the location is unsafe.
Which Related Tire Problems Should You Understand?
A wheel change can stop at several connected points. Use these guides to identify the next safe action:
Return to the complete tire-change guide only after this problem is resolved. The normal sequence should not continue with damaged parts, missing equipment, an unstable lift, or a wheel that cannot be secured correctly.
Quick answers
Frequently Asked Questions
What can you do if you get a flat with no spare?
Use the approved mobility kit or run-flat system when the damage qualifies, otherwise call roadside assistance or request towing..
Can tire sealant fix any flat?
No. It is generally limited to certain small tread punctures and cannot fix sidewall cuts, separated tires, or damaged wheels.
Can roadside assistance provide a spare tire?
Some providers may offer limited replacement options, but many will tow the vehicle when no compatible spare is available..
How far can you drive on a run-flat tire?
The limit varies by tire and vehicle. Follow the sidewall and owner’s manual and stop for unstable handling or visible damage.
Can you add a spare to a car that did not include one?
Sometimes, but the wheel, tire, hardware, storage, and lifting equipment must be approved and compatible with the vehicle..